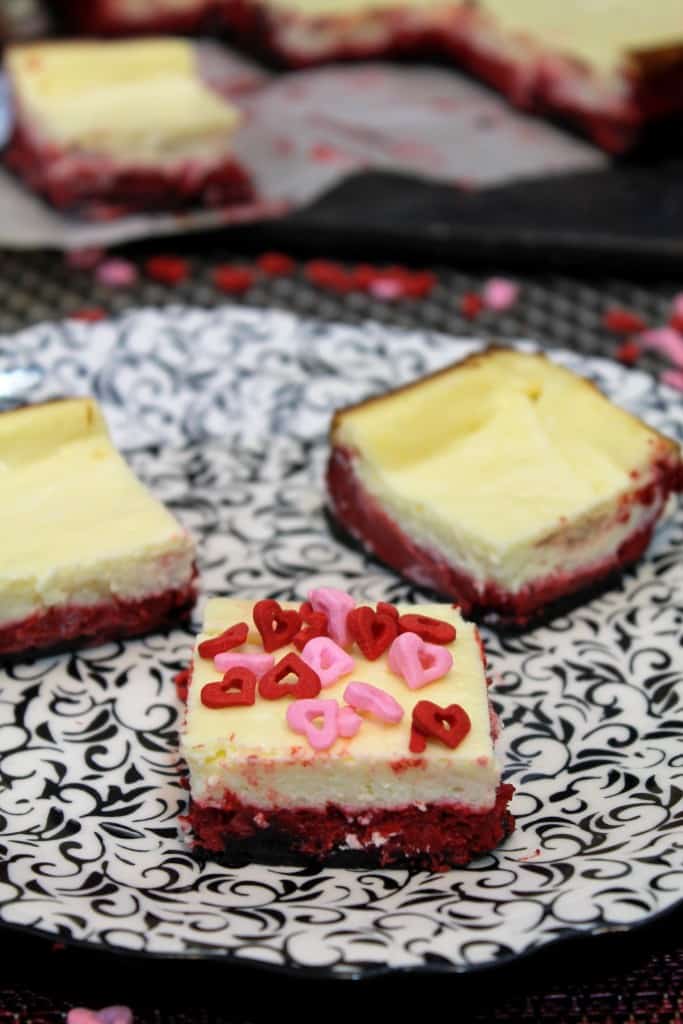
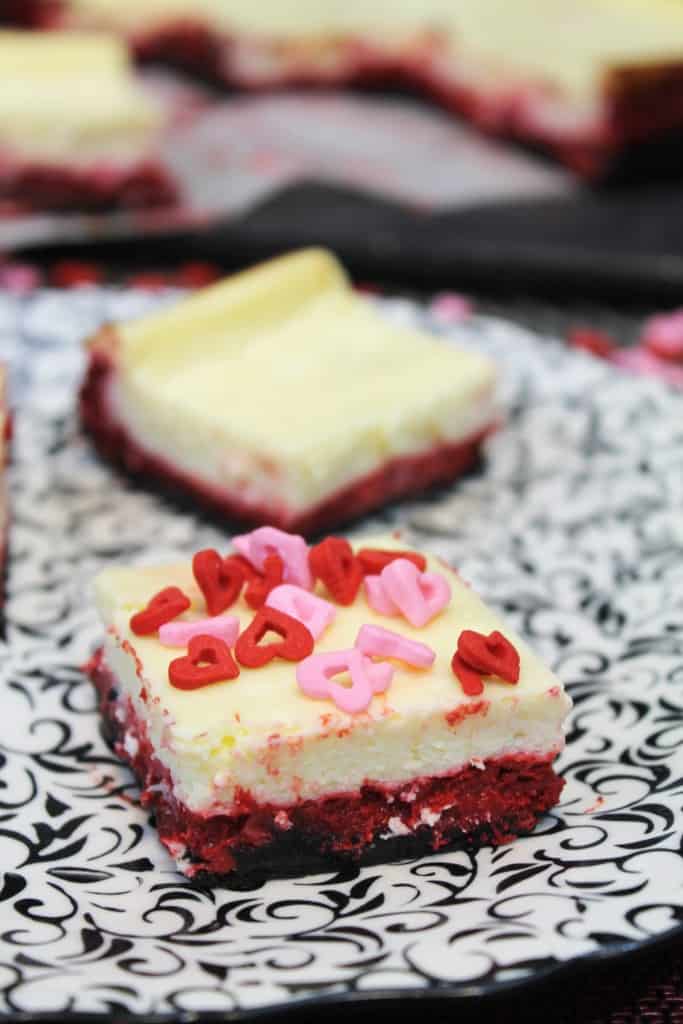
Red velvet isn’t complete without cream cheese. These cheesecake bars have a layer of red velvet cheesecake topped with a plain layer. Don’t forget the Oreo crust!
Welcome to Day 2 of #TripleSBites where 20 bloggers including myself are sharing spicy, saucy, and secy recipes for Valentine’s Day and beyond (said like Buzz Lightyear)! When it comes to Valentine’s Day desserts, decadent desserts as king and red velvet is a popular category. It’s time to splurge after 1-1/2 months of abiding by your new years resolutions so let’s make some red velvet cheesecake bars!
![]()
These bars have an Oreo cookie crust, topped by a layer of red velvet cheesecake, followed by another layer of plain cheesecake. The result is a bar that resembles a red velvet sheet cake topped with cream cheese frosting. Top them with fruit, fresh whipped cream, sprinkles, or enjoy them straight up. Whatever tickles your fancy!
Don’t forget to enter for a chance to win the big #TripleSBites giveaway. Click HERE and use the widget located at the bottom of the post.
One year ago: Smoked Sea Salt Caramel Dark Chocolate Chip Cookies
Three years ago: Nutella Recipe Roundup
Four years ago: Cocoa Brownies with Browned Butter and Walnuts
RED VELVET LAYER CHEESECAKE BARS
Serves 16
Ingredients:
CRUST
8 oz. (approximately 16) whole Oreos, finely ground in food processor
3 Tbsp unsalted butter, melted
FILLING
2 (8 oz.) pkg. cream cheese, room temperature
1/2 cup plain Greek yogurt (I used 4% Chobani)
1/2 cup sugar
1-1/2 Tbsp all-purpose flour
1 tsp vanilla extract
2 eggs, room temperature
1-1/2 Tbsp cocoa powder
1 Tbsp red food coloring
1/2 tsp white vinegar
Directions:
- Preheat oven to 350°F. Line a 9-inch square baking pan* with parchment paper, leaving overhang on opposite sides, and lightly grease. Set aside.
- In a medium bowl, combine cookie crumbs and melted butter until crumbs are evenly moistened. Press evenly into prepared pan. Bake for 7 to 8 minutes or until set. Remove from oven and cool completely.
- In a large bowl with an electric mixer, beat cream cheese, yogurt, sugar, flour, and vanilla until well blended. Add eggs, 1 at a time, beating on low speed just until blended.
- Measure 1 cup batter into medium bowl. Whisk in cocoa, food coloring, and vinegar. Pour into crust. Evenly top with plain cheesecake batter.
- Bake 40 minutes or until center is almost set. Cool completely on wire rack. Refrigerate 3 hours or overnight before serving.
*You could also bake this in a greased 9-inch pie or springform pan
Source: Adapted from McCormick.
Made something from the blog?
Be sure to share it
on Instagram with the
tag #TheSpiffyCookie
[inlinkz_linkup id=481748 mode=1]

8 comments
[…] Red Velvet Layer Cheesecake Bars from The Spiffy Cookie […]
Yum! I love cheesecake! This is so festive!
Ooh, cheesecake!! Looks fabulous!
These are adorable…and, I’m sure, are delicious as well. Thanks for sharing with #TripleSBites.
These are so adorable!!
These look great! Perfect for Valentine’s Day
ummm – YES please!! These look phenomenal! Yumm!
YUM!!! They are adorable.